♥ ♥ ♥

Archive for the ‘autumn’ Category

spaghetti with cherry tomatoes and tarragon

In autumn, Italian, late summer, pasta, summer on 11 March, 2013 at 10:38 pm

OLYMPUS DIGITAL CAMERA

I’ve taken to drinking a lot of coffee on the weekends.

This leads, predictably, to the two o’clock jitters and empty stomach panic: I want to eat anything! everything! right this instant! I start flipping through cookbooks in a haze of craving and indecision, passing over recipes that take fifteen or twenty minutes or more, because I want something now, fifteen minutes is too long, I don’t have this or that ingredient, this looks like too much work and oh I might faint I’m too hungry now. (Fifteen or twenty minutes passes in this manner.)

The lifesaver comes in the form of Nigel Slater’s really handy book Real Fast Food and a recipe in it called “tomatoes fried in butter and sugar” or something like that, which immediately appeals to me for two reasons: 1) I have all the ingredients, having just bought a punnet of cherry tomatoes at the vege market, and 2) it’s called “tomatoes fried in butter and sugar”. Oh, also it takes just two minutes to make, according to the recipe. Excellent.

The problem is, I’ve got the empty-stomach caffeine shakes and I feel like I need to eat with these tomatoes some kind of substantial carb to settle me down, and I’ve got no bread (I’m kicking myself for not buying a loaf earlier, but what can you do). I do, however, have spaghetti and with that realisation I put down the book and get to work.

OLYMPUS DIGITAL CAMERA

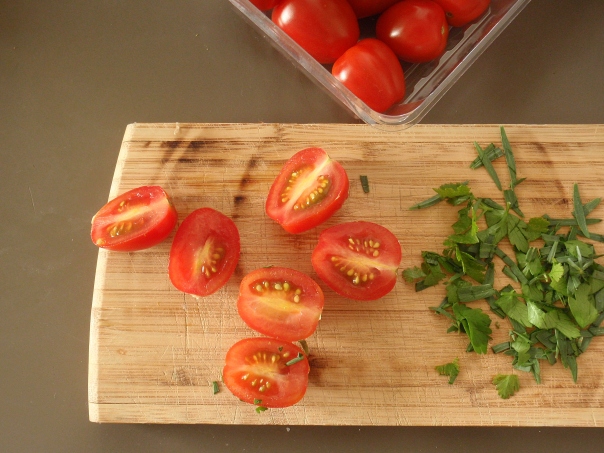
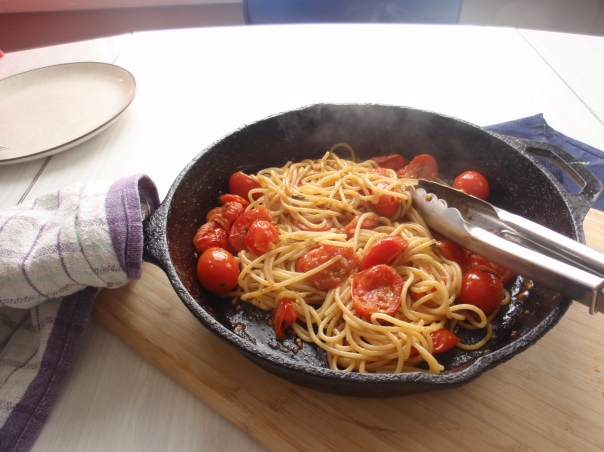
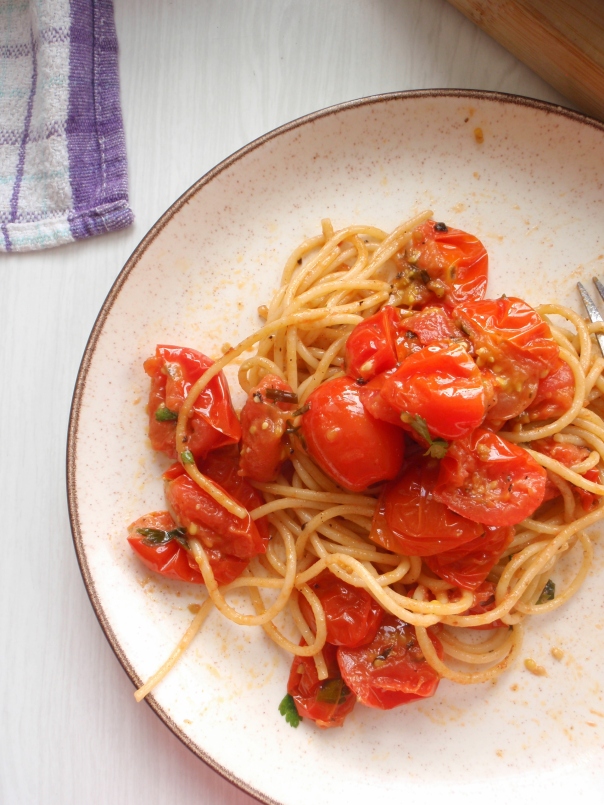
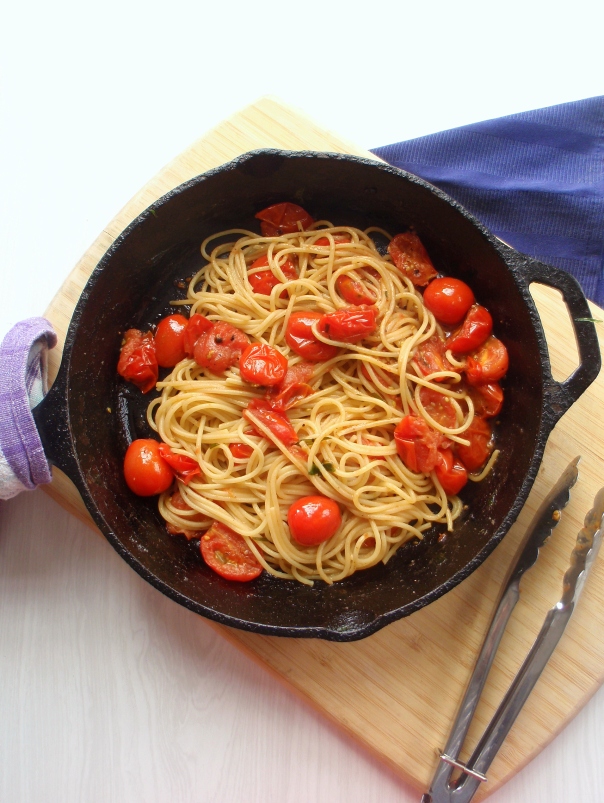
Nigel’s recipe is really simple – to paraphrase: fry some tomatoes in butter and sprinkle a bit of sugar over at the end – but I feel like adding a little tarragon and parsley from the garden because I can. I add a little anchovy paste too, mostly because I’m excited about the lovely old-fashioned tube it comes in, but also to add a bit of extra oomph, because I can. I add the spaghetti to the skillet with the semi-saucy tomatoes and eat most of it out of the pan before changing my mind and transferring the rest to a plate (I really have no idea why. It tasted great either way).

My cherry tomatoes were mostly really big so I cut them in half, but if you can leave at least some of yours whole I recommend you do it: the whole ones sort of burst as you pierce them with your fork and spill their juices all over the mouthful of spaghetti you’re about to take. It’s glorious. The sugar gives it this sort of gentle sweetness reminiscent of slow-roasted tomatoes, and the softly sweet tarragon brings this out even more. And if you cook your pasta just a little past al dente then it almost becomes like a grown-ups’ version of tinned spaghetti. This is something I totally can get behind.

The best part about this meal? It was ready in the time it took to boil the jug and cook some pasta, and that’s really great when you’re shaky and hungry and must-eat-something-now. It’s super easy but I’ve posted some instructions below, for those who’d like a bit of guidance.

OLYMPUS DIGITAL CAMERA

SPAGHETTI WITH CHERRY TOMATOES & TARRAGON

Bring a pot of water to the boil (make sure you use plenty of salt) and chuck some spaghetti in there. In a skillet or heavy-bottomed frying pan, melt two or three tablespoons butter over medium-high heat until foaming. Add some chopped tarragon (I used about a teaspoon worth but you could easily use a bit more) and about half a teaspoon (or more) anchovy paste*, fry for a few seconds, then add 250g cherry tomatoes. Cook for a couple minutes or until the spaghetti’s done. Reserve some of the pasta cooking water in case you need it to loosen up the sauce; drain pasta, add to the pan with the tomatoes, toss to coat. Add a bit of parsley before serving.

Serves 1 but can easily be doubled or tripled as needed. 

*You can easily omit the anchovy paste and make this dish vegetarian, if you’re so inclined.
OLYMPUS DIGITAL CAMERA

Tomato party

In autumn, pasta, salads, summer on 30 April, 2012 at 10:35 pm

Now, I realise tomato season’s pretty much drawing to a close for most of us in the Southern Hemisphere, but I’ve been hearing reports of some late-season harvests in gardens around here; helped, no doubt, by the Indian summer days we’ve been having this autumn. And I’ve spotted some nice-looking heirloom varieties at the organic store – surely a sign that it’s still seasonally appropriate to be posting this recipe this late?

And if there’s one last thing you make with fresh tomatoes before winter sets in, let it be this: Yotam Ottolenghi’s aptly named Tomato Party from his most excellent cookbook Plenty. Apt, because, really, a party is what this is: as many different kinds of tomato you can get your hands on, cooked to varying degrees, every mouthful is full of different incarnations of the tomato. Juicy roast tomatoes? Check. Savoury-sweet balsamic-glazed tomatoes? Check. Raw, tangy and sweet tomatoes? Yep. And you could keep going, too, adding different varieties of tomato or changing up the cooking method. It’s a fitting farewell for this summer fruit that frankly, I wouldn’t bother buying all winter.

I was lucky enough to be given a paper bag full of beautiful tomatoes* from the very generous Sue of Five Course Garden, who has what is possibly the most productive compact garden of anyone I know. It’s tiny and huge all at once, and is truly a joy to poke your nose around (and I’m not just saying this because both times I’ve been to see Sue I’ve left laden with fresh produce!) – it seems like every nook and cranny has got something edible growing in it.

And these tomatoes – just look at them! They’re the exact opposite of the bland supermarket tomatoes that get especially blander and more average as autumn fades into winter. They were stripey and purple and green and juicy and sweet, with so much more flavour than anything you could buy. And what better way to celebrate them than this tomato-rich couscous salad?

I pretty much followed the recipe straight from the book, adapted to the ingredients I had on hand: I used an assortment of Sue’s tomatoes, supplemented with a handful of orange cherry tomatoes I had lying around the kitchen and some vine tomatoes that were fast-approaching their use-by point. I used whole wheat Palestinian couscous (the stuff I used here) instead of fregola or mograbieh, because it’s what I had, and let’s face it – mograbieh is expensive. (I still got the delightful textural contrast of different-sized couscous, though in a pinch you could just as easily use one type of couscous, I mean, the recipe isn’t called “couscous party”, is it?)

The recipe that follows, though, is going to be more of an imprecise method than Ottolenghi’s instructions, because yesterday something really happened: Kate and Jason came over and we swapped cookbooks, SO, now I have (temporarily) parted ways with Plenty and my other current favourite, Nigel Slater’s The Kitchen Diaries, and have got my hands on Ottolenghi: The Cookbook and Thomas Keller’s Bouchonboth of which have been on my cookbook wishlist for what feels like forever. Hooray!

So anyway, I don’t have the book to refer to for this recipe, so I’ve cobbled together bits and pieces from memory and also from the ever-helpful internet (especially this earlier version of the recipe, which appeared in the Guardian in 2007 – actually, that might be pretty much the same as the version in Plenty. But I can’t know for sure). It’s more of  a rough method, anyway – cook some tomatoes a few different ways, mix with a couple different kinds of couscous, enjoy.

*Actually, the purpose of my visit was to pick up some tomatillos Sue had set aside for me – after sampling her harvest last year and making the best salsa verde and chilaquiles I’d had in a long time there was no way I was going to be able to refuse her offer. This year’s crop was great too – more on that later, though!

OTTOLENGHI’S TOMATO PARTY
(adapted from Plenty,and from this earlier version of the recipe)

Preheat the oven to 175C/350F. 

Cook 125g couscous according to the instructions on the packet; fluff with a fork and set aside. Do the same with 150g Palestinian couscous, or mograbieh if you’re lucky enough to have some, or some fregola or Israeli couscous. 

Meanwhile, halve or quarter (depending on size – you want them to be bite-sized when they’re cooked) a good bunch of vine tomatoes, around 300g or so. Put on a baking tray lined with baking paper or tinfoil, season with a bit of salt and pepper, some brown sugar and balsamic vinegar, give it a good drizzle of olive oil. Put in the oven for about 30 minutes until they’re shrivelled but still juicy. The balsamic vinegar, sugar and oil should have melded with the tomato juice and be a little bubbly but not too sticky. Remove from the oven and set aside in a bowl, adding all the juices from the pan.

Next, increase the oven temperature to 200C/400F. Halve about 200g cherry tomatoes and place on a clean piece of baking paper or foil on your baking sheet, season them with salt and pepper and olive oil and stick them in the oven for about 12 minutes.

Cut up some more tomatoes – about 100 to 150g – hopefully you’ve got an assortment of colours and sizes but if not, don’t worry too much.

Once you have all your tomatoes, mix the two types of couscous together and add a whole bunch of chopped herbs – I used tarragon, parsley, oregano & basil – and some crushed garlic, all of the tomatoes and all of their juices.*  Season to taste. Eat at once.**

*Other things you could add at this point that would be very delicious: crumbled feta, torn buffalo mozzarella, shelled & chopped pistachios, bits of streaky bacon. Or nothing else at all. This is, after all, all about the tomatoes.

**I can report this also tastes very, very good served at room temperature the next day, when the flavours have had a chance to mingle overnight.

chicken & barley soup

In autumn, soup, winter, year-round on 23 April, 2012 at 7:10 pm

It’s hard to believe we’re already almost at the end of April, the days are getting shorter and darker, I’ve finally re-embraced wearing tights. It seems like just yesterday that we were all complaining about the lack of a summer, and now here we are, thigh-deep in autumn, whether we like it or not. I like it. Despite the deliriously frantic pace of the last few weeks, this autumn has been nice – that sort of settling-in feeling has set in, I’ve been making soups and curries and braised meats and bringing out the woolly jumpers and savouring every bit of it.

This time last year was much the same: April sped by at a breakneck pace, just shy of overwhelming. But this time, though it’s crept up on me, I’m in a bit more control. If last April started with a bang and a headlong descent into a chaotic busy-girl frenzy, this year’s April started with a whimper and a steady crescendo to a controlled pandemonium. Which is better, I guess.

At the beginning of the month (and I can’t believe it’s already three weeks ago) I found myself huddled under the duvet in a friend’s* bed in Auckland, that horrible alternating between shivery cold and feverish sweat, dreaming weird feverish dreams in which I didn’t make it back to Wellington alive. Of all the times I could possibly get sick, of course it had to be on a weekend away.

So that was awful. But despite my fever-induced delusions to the contrary, I did live to see the morning (and an excellent breakfast at Kokako in Grey Lynn, and the Degas to Dali exhibition at the art gallery, and some amazing turbot sliders at Depot), and I managed to make it back to Wellington alive.

And when I got home, I made this soup. It’s a simple chicken soup, simple enough to make when you’ve got nothing in the fridge, just as long as you get some bone-in chicken pieces and a carrot or two. It was super delicious, and it saw out the rest of my cold, and the rest of that crazy-busy week when the only thing I wanted was the thing I didn’t have time for: rest.

Image

You see, chicken soup is the best thing for when you’re sick, tired, hungry, stressed, overwhelmed, all those things that happen to people all the time but to me especially when the seasons are changing and it’s getting colder and darker and things are getting busy. It’s down-to-earth, pure, simple comfort food, and it’s kept my feet firmly planted on the ground during what was an incredibly busy couple of weeks.

This recipe is really more of a loose method than anything else. You might have your own favourite chicken soup recipe; for those who don’t I’m sharing mine. It’s simple enough that you can make it even when you’re too feeble to do much else, which is an important thing for this kind of food.

Feel free to get creative and add or subtract ingredients – the key thing you’re looking for is a deeply soothing broth with chunks of meat and vegetables. Things like barley, noodles, rice, little alphabet pasta, etc are an added bonus – I really, really like the almost-chewy, wholesome quality of barley though.

*so many thank-yous to Sophie for looking after me! x


CHICKEN & BARLEY SOUP

Get a bone-in chicken leg quarter, or 3 or 4 drumsticks, or any combination of bone-in chicken pieces. Put in a big pot and cover with plenty of water. Add some things like: an onion, sliced in half, a carrot, maybe some celery tops, herbs from the garden, peppercorns, bay leaves, that sort of thing. Bring to the boil, skim off the scum that rises, cover and let simmer on a low heat until the chicken’s cooked and comes off the bone easily – about an hour.

Take the chicken out of the pot, pull the meat from the bones, return the bones to the pot and let simmer as long as you can manage – an hour more, perhaps, or longer if you’ve got time to kill, like if you’ve taken the day off work.

Meanwhile, chop up the chicken (or pull apart with your fingers, depending on how you like it) and set aside. Roughly chop a carrot or two, an onion, celery if you’ve got it, plenty of garlic. 

In a heavy-bottomed pot, heat up some butter or olive oil (or both) over a medium heat and saute the carrot, onion and celery until they start to soften a bit. Add the garlic and some sprigs of thyme* and let cook a little bit more until fragrant, then add some pearl barley (I used about 3/4 cup, but you could use less or more depending on how thick you want it – just adjust the liquid if need be). Season with a bit of salt and pepper.

Using a sieve, strain the chicken stock from the other pot into the pot with the vegetables and barley. If it needs more liquid, add a bit of water and adjust the seasoning. Bring to the boil and then let simmer for 30 minutes or until the barley’s nice and tender. Add the chopped chicken, heat through, taste and adjust seasoning as needed.

Serve on its own or with hot buttered toast.

 —

*or whatever herbs you’ve got on hand that you think might go nicely: oregano, chopped up rosemary, tarragon, etc.

Image

pear, feijoa & ginger crostata

In autumn, baking, desserts, winter on 18 August, 2011 at 8:10 am

Okay, so I know what you’re thinking. Feijoa? In August? You’re right, this post has been sitting here for a wee while. 

But I’ve been wanting to post it anyway. I’ve been in a little bit of a seasonal rebellion. Feels like it was only yesterday that I was lamenting the end of summer and relishing the settling-down feeling of autumn. Feels like it went by in too quick a flash and suddenly all at once winter had set in, the shortest day had come and gone, and we were hurtling recklessly down a fast track into spring. The days were (still are!) getting longer, there were snowdrops and daffodils and lambs on the side of the road coming back from the mountain, the birds seemed to be chirping a bit more, I  smelled something akin to that distinct smell of thaw* in the air in the still, clear mornings.

It came to a head last weekend when I was in Auckland visiting friends and it was warm (warm enough for bare legs and no woolly coat! for a little while at least), springlike, magnolias flowering everywhere. And it was nice. But I thought, hang on. It’s still August. I’m not ready for spring yet. Spring is  full of new beginnings and everything young and tender and bursting with potential. And yes, it’s exciting, with changes afoot and everything moving forward and so on. But not just yet. Not for me, anyway.

So when it snowed on Monday (I was still in Auckland during the first snow on Sunday) and I couldn’t contain my excitement, maybe there was a bit more to it than just the novelty of seeing snowflakes outside my window. In Wellington. On The Terrace. (!!!) Maybe there was a little bit of relief in there too, a little bit of: slow down now, relax, it’s not spring yet.

And as much as I’ve been scrunching up my face at the hail, at the sleet, at having to take taxis home when the buses have stopped, this ridiculously wintry weather has been kind of a reprieve from the dizzying trajectory into spring. Spring is full of opportunity: I’m not there yet. Almost, but not just yet. I’m still holding on to winter, to stews and roasts and snow, to weekends spent with friends and homemade steak pies and mulled wine and hot chocolates, woolly blankets and daydreams. I’m a huge fan of spring and summer but I’m still grasping backwards, to a simpler time, cosy and pleasant and quiet: early winter, maybe even late autumn, when the whole hunkering-down business was still ahead of us and things wouldn’t be picking up speed for a while.

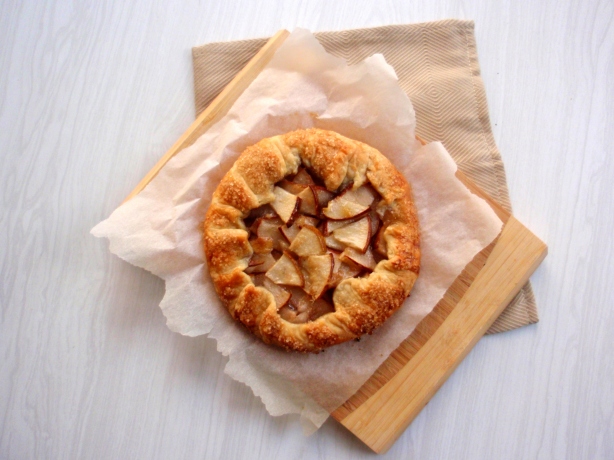
So that’s why I’m sharing this late-autumn pie. The time will soon come when I have to let go and embrace the new, the young, the fresh, to fill my pies with the very first strawberries, to scan supermarket shelves wildly for asparagus. But not just yet.

Until that time comes I’ll be happily making soups and stews and eating the last of the pears, hanging onto the gritty-sweet memories of last season’s fruit. Like feijoas. (Though the other night I did make a pear and tamarillo crumble which is a far more appropriate fruit combination for right now: I reckon it would work beautifully in this pie.)

*If you’ve ever lived in a place where everything (the ground, rivers, lakes, etc) freezes over in the winter you’ll know what I mean… that sort of raw, earthy, fresh dirt smell after months of smelling practically nothing outside. It’s invigorating.

PEAR, FEIJOA & GINGER CROSTATA (makes 2 smallish or 1 large pie)

For the crust:
(recipe adapted from The Sweet Melissa Baking Book via this Serious Eats post)

140g flour*
1 Tbsp sugar
1/8 tsp baking powder
1/4 tsp salt
110g butter, very cold & cut into little pieces
3-4 Tbsp ice cold water, as needed

Sift together the dry ingredients. Add the butter pieces and toss so that they’re coated in the flour mixture. Rub the butter into the flour (or use a pastry cutter or food processor) until the mixture reaches a pebbly consistency.

Sprinkle 3 tbsp of the cold water over the mixture, and using your hands, work the mixture into a dough. If it’s not sticking together enough, add a little more water (only a bit at a time); if it’s too sticky, add a bit more flour. Form into a ball. If you’re making 2 smaller pies, as I did here, divide the dough into 2 and roll into balls. Flatten them a bit, wrap in plastic wrap, stick in the fridge to cool for at least half an hour.

For the filling:

Chop up roughly 350g pears (about 1-2 smallish pears) and scoop out the flesh of 1-2 feijoas (you could easily use tamarillo, or rhubarb, or any pie-appropriate fruit, really). Place in a bowl, grate some fresh ginger over the top, sprinkle over a handful of sugar (I used brown sugar), mix it up and let it sit for a bit.

Assembly:

Preheat the oven to 350C.

Take the chilled pie dough out of the fridge and roll out onto a floured surface until it’s about 1/8 inch thick** and of a more or less circular shape. Trim any weird scraggly edges, but you don’t have to be too meticulous – this is a free-form pie, so a  little inconsistency is okay. (It adds character!)

Pile the fruit in the middle and fold over the outside edge, pinching a bit as you go. Dot the fruit with little torn-off bits of butter, brush the pastry with an egg wash of a beaten egg & a splash of milk, sprinkle demerara sugar over everything and stick in the oven for 25-30 minutes (if you are making one larger pie, you may need to have it in the oven for longer) until the fruit is cooked and the pastry’s nice and golden.

Let cool a little bit and serve with whipped cream or creme fraiche or a bit of plain yoghurt. 

*I’ve made this with both wholemeal flour and various combinations of white and wholemeal. It works however you do it, though you may need to tweak the amount of butter and/or water a little bit.

**You don’t want it to be too thin – this pie doesn’t have the benefit of a pie dish to hold it all together, so you’ll want it to be sturdy enough to hold in the juices.

ps. this is my first contribution to the Sweet New Zealand monthly blogging event organised by Alessandra. Got it in just in the nick of time :)

hot milk, honey + nutmeg (the best hot drink, hands down)

In autumn, drinks, gluten free, winter on 24 July, 2011 at 10:09 am

If you’re reading this in Wellington (or, well, most of New Zealand) you’ll know why I’m posting this today. This weekend has been disgustingly miserable, cold and blustery and wet, and I made the big mistake yesterday of leaving the house. On foot. I had a raincoat on, not that it made much difference: I was completely soggy from mid-thigh down, and damp everywhere else. My usually waterproof handbag had a little puddle of water inside. By the time I got back home I was exhausted, shivering, chilled to the bone in a way I haven’t been in a long time. So: to the rescue, only the best hot drink there is.

This drink comes by way of a dear friend and former flatmate who worked at Deliaro what feels like an age ago. It was our first year flatting, in what might have possibly been The Coldest Flat in Wellington (tied, of course, with most other cheap student flats in Aro Valley and Kelburn, I’m sure) where wind blew through cracks in the floorboards in the lounge and bottles of olive oil would start to solidify in the cupboards. I’m not making this up, though admittedly the drafty lounge floor was partly our own doing: it took us a long time, maybe until the second winter, to finally decide it might be a good idea to move the rug the landlord gave us to put in the lounge into the lounge. (But I mean, it clashed with the grass-green lounge walls, the colour we’d picked out when we moved in and the landlord said he’d have the lounge repainted. Sheesh. Nineteen.)

When winter rolled around and we all went and bought heaters for our rooms and then got our first $1000 power bill and then quickly banished all the heaters to underneath the unused dining table that sat next to Fridge No. 2, which always leaked unpleasant odours, we mostly abandoned the cold, drafty lounge. Or at least the way I remember it. In any case, I never spent much time in there that winter.

What I remember more from that first cold winter was, if I wasn’t huddled under duvets in my room, hanging out in the kitchen: glaringly bright from the combination of stainless steel benchtops, ancient cupboards the colour of rancid cream and the harsh fluorescent light that took up most of the ceiling. It was probably the smallest room in the house: puzzling for a place that housed eight, more or less. We’d stand shoulder to shoulder chopping vegetables, jostle over stovetop elements, argue over who hadn’t cleaned up their mess (touchy subject when bench space was at a premium) or who’d been eating whose cheese or Nutella.

It was a volatile space, not the most pleasant. But for whatever reason, people would mill about there: standing around, waiting for the jug to boil, leaning against the awkwardly placed microwave, talking to whomever was cooking or doing the dishes. I doubt it was because the kitchen was any nicer than the rest of the house (it was pretty much on par), or because it was brighter (the colour and lighting scheme was austere, institutional more than anything). Probably because it was a little warmer than the rest of the house, and probably for the same reason people mill about in kitchens the world over.

Anyway it was late on one of those cold nights where we’d stand around the cramped yellow kitchen in our slippers and dressing gowns that I first watched my flatmate making this drink. It’s something they had (probably still do?) at Deliaro when she worked there, and she used to make it back at the flat. It was also the first time I’d seen someone grate fresh nutmeg into anything. Fascinating.

I didn’t really get into making this drink for myself then, but the thought stayed with me until maybe a couple years ago, when in a fit of nostalgia and also probably the throes of a winter storm I remembered the drink my friend used to make, and realised I now had my own little box of whole nutmeg for grating into things. Since then it’s been my go-to hot drink: forget hot chocolate or lemon, honey & ginger drinks. This stuff is The Best. (And the least fuss.)

I wasn’t ever one of those kids who got given hot milk before bed, mostly because I didn’t like drinking milk. But I imagine this would be perfect for that sort of thing: smooth, sweet, warming, laced with deeply fragrant nutmeg.

HOT MILK AND HONEY WITH NUTMEG

Heat up a mugful of milk per person (preferably full-fat/whole milk, the best you can find*) until just starting to froth. Put a spoonful of honey**, to taste, in a mug.*** Pour the hot milk over the honey; give it a stir. Grate some nutmeg over the top. Carry the mug over to the couch. Snuggle up under a blanket; enjoy.

*I don’t have any on hand to test my theory but I bet this would be beautiful with a creamy, full-bodied raw milk. If you have access to raw milk, let me know if you try it!

**I usually use a honey with a pretty strong flavour, like manuka – I like how the taste of the honey stands out as distinct against the milk and nutmeg. But feel free to use whatever honey you prefer.

***To help the honey dissolve effortlessly, before adding the milk I usually pop the mug (with a spoonful of honey in the bottom) in the microwave for about 10 seconds or so until it goes all liquidy.

brussels sprouts with toasted walnuts & pancetta

In autumn, gluten free, sides, travel, winter on 19 July, 2011 at 10:17 pm

The other night, I simultaneously burnt and overcooked-to-the-point-of-mushiness what should have been a delicious bowl of brussels sprouts (oh, internet with your myriad distractions).  Half out of sheer hunger/tiredness and half out of you-got-yourself-into-this-mess stubbornness, I smothered them in pecorino romano and butter and ate them. I’ll say this: the cheese was good. I’ll also say this: even without the acrid burnt taste they would’ve still conjured up childhood vegetable nightmares. Yep, they were that bad.

These are not those brussels sprouts. But I felt I had to do something to make up for the ones I did such a disservice to. Because brussels sprouts – poor things, they’re so maligned, and undeservedly so – need all the good press they can get. Cooked right, they’re a joy: nutty, almost sweet, tender-crisp. And cut in half they’re the perfect bite size, their little cabbage-leaves soaking up all the butter they can handle (which is a lot).

If you knew me at all as a child you’d know that I was ridiculously picky; the closest I’d get to voluntarily eating vegetables was poking at a few leaves of lettuce in a salad or dipping a carrot stick in miso (try it sometime!). And perhaps because no one in my family liked brussels sprouts except my dad, they appeared on the dinner table only once – maybe twice – a year, at Thanksgiving* and sometimes Christmas dinner, when we’d clear the dining room of all the boxes and junk that had accumulated from non-use (we were a family of kitchen-table eaters), set the table with a hardly-used tablecloth and the special plates we wouldn’t see for the rest of the year, and my dad would repeat his annual campaign to get us all to help him eat the brussels sprouts. We wouldn’t.

Until one year not so long ago, when I returned home for the holidays and my dad did something we brussels-sprouts haters had never heard of: he cooked the brussels sprouts with bacon and almost-caramelised onions. I secretly think he would’ve done this ages ago if he had actually wanted to share the brussels sprouts with the rest of us, because between my brothers and me, they flew off the table. (It might’ve had something to do with bacon’s magical ability to make everything taste Damn Good, but I like to think that’s where my brussels sprout appreciation started…)

Now I can’t wait for brussels sprouts to appear each year and I’ve been eating plenty while they’re in season and cheap. I love them braised or sauteed but I’m just as likely to make a simple snack of them by quickly boiling or steaming them just til fork-tender and eating them with butter, sea salt and cracked pepper.  This time I’ve sauteed them with pancetta and shallots, sort of a throwback to that first eye-opening brussels sprouts experience. Thanks Dad.

Funny how we turn into our parents, how we start doing the things we swore we’d never do.** But when I have kids, I won’t be relegating brussels sprouts to a once-yearly cameo.

BRUSSELS SPROUTS WITH TOASTED WALNUTS & PANCETTA (serves 2-3 as a side dish, depending on how much everyone likes brussels sprouts)

Take 10-12 brussels sprouts, trim off the bases and the outer leaves, slice in half vertically. If you’re using particularly big brussels sprouts it may pay to parboil these for a couple of minutes, but I try to pick smaller ones

Dice 1 good-sized shallot (or 2 smallish ones) and saute in butter over medium-low heat until it starts to get soft. Cut up 1-2 slices of pancetta (or bacon) into little pieces and add those to the pan, saute until they start to firm up, then add the brussels sprouts. At this stage I like to add more butter, plenty of it, the more the better. Saute until they’re just starting to brown, but don’t overcook them: when you can just stick a fork through them with little to no resistance, they’re done.

Meanwhile, toast a handful of walnuts (you could just as easily use pine nuts): you can do this in a skillet, or chuck them in a tray under the grill in your oven. Just don’t burn them: keep your nose on alert for that awesome nutty smell. Toss with the brussels sprouts and season with sea salt and cracked black pepper. Grate some parmesan over the top to serve. Eat immediately.

*Yep, I grew up in North America.

**It’s not just my dad I’m turning into (food-wise, anyway). Last month I was in Tokyo searching for this steamed-bun cafe, had forgotten to make myself a little map in my notebook (Tokyo streets are notoriously difficult to navigate if you’re looking for something down a little alleyway – the address alone usually is of no help), and, half-determined to find it and half-enjoying wandering around, spent a couple of hours walking up and down the main street in Kagurazaka. I never found the cafe, though I did find an eerily cosy coffee bar straight out of 1980s Japan, serving drip coffee to rival the likes of Customs or Lamason, and I found a little shop selling the most delicious taiyaki (this one filled with sweet purple yam paste:

But it was my last day in Tokyo, I had only hours left to do all the things I had planned on doing, I hadn’t had breakfast (!! I know), it was raining, my feet were soaking wet, I was tired and hungry and still hadn’t found the cafe I came all the way to Kagurazaka for. And then I found something far better: an unassuming Japanese restaurant serving a few different kinds of teishoku – set meals with rice and miso soup – and something pulled me in, some weird instinct which told me to forget about the steamed-bun cafe. This was what I needed. Before I even sat down I ordered the yakizakana teishoku almost without thinking.

It’s not something I would’ve gotten excited about five or ten years ago when visiting Japan. In fact, I wasn’t even that excited about it this time, except for this gut feeling that I knew I was doing the right thing. And I couldn’t quite pinpoint why, until I thought about what I was eating. Grilled fish with grated daikon, rice and miso soup, some pickled vegetables – exactly the meal my mum would cook for herself when we’d eat Japanese at home (pretty frequently, since Mum grew up in Japan). As a kid I’d stick with the rice and miso soup, turning my nose up at everything else.

I’ve long since started eating fish and tsukemono but I never gave much thought to how much I was turning into my mother until the moment last month when I finished this meal and thought the thought I never thought I’d think: whether I’m hungry, tired or frustrated, there’s nothing that puts me more at ease than a simple meal of rice and miso soup, salted grilled fish, pickled daikon.

I’m sure I’ve heard that exact sentiment from my mum so many times while growing up, and always thought she was nuts: there’s so much food (Japanese or otherwise) that’s way more exciting and comforting (what about the mac and cheese, mum?!). But somehow, in some way, she was totally right all along, and that simple, humdrum meal was the most special of my trip. Thanks Mum.

ginger-poached quince

In autumn, breakfast, sweets on 8 July, 2011 at 7:45 pm

I know, this post is woefully out of date, and quinces are woefully out of season. But I’m going to post this anyway, because the recipe is equally applicable to pears, and this is just as much about the porridge as it is about the quinces.

Every Sunday when I was growing up (and maybe he still does) my dad would make himself a big bowl of porridge and a big pot of coffee and spread the Sunday paper all across the dining table and go through it page by page.

He cooked the porridge with a special pot and a special wooden spoon (actually a wooden shamoji) that no-one was allowed to touch for anything else. And if I wasn’t too busy wolfing down cereal, or getting in the way of the paper, I’d get some too.

Dad’s weekend porridge was special, different to the sickly sweet instant sachets I loved at the time. For one, it took longer to cook than sixty seconds in a microwave. And unlike the flavours I loved (blueberries n’ cream! maple walnut spice!) his never changed: just brown sugar and milk, over perfectly cooked oats.

But I loved the way the brown sugar melted into caramel pools swirling in milk, the pure sugar hit I’d get for the first few spoonfuls while I resisted stirring it in, finally succumbing after a few bites and mixing it all together.

Porridge is such an intensely personal thing. Every person I’ve met (and talked porridge with) has their own favourite way of making it. Some people claim not to like porridge, but I like to think they just haven’t found the version that suits them yet. (If that’s you, don’t give up!) My favourite way of eating porridge isn’t the way my dad makes porridge, or how you’ll get it in a cafe (well, any cafe I’ve eaten porridge at, at least).

I like my oats hearty and whole, chewy almost, but still cooked through and soft enough to qualify as comfort food. I soak them overnight with a little bit of buttermilk or plain yoghurt – according to this book soaking the oats helps break down phytic acid and improve their nutritional benefits, but I mostly like the way it cooks up in the morning, quick and extra-tender. And instead of milk, I top my porridge with a bit of butter and a splash of cream – the butter sounds weird, but trust me, it’s good.

(In case you’re interested, I’ve posted my method below.)

But back to these ginger-poached quinces: save this thought for next quince season. They’re so very good, and simple too. You just need a bit of time and patience for them to cook ever-so-slowly until they get all rosy and soft and sweet and gingery. (So gorgeous and dainty, I could fawn over them all night but I won’t, because it’s Friday and a girl needs a night out every once in a while.)

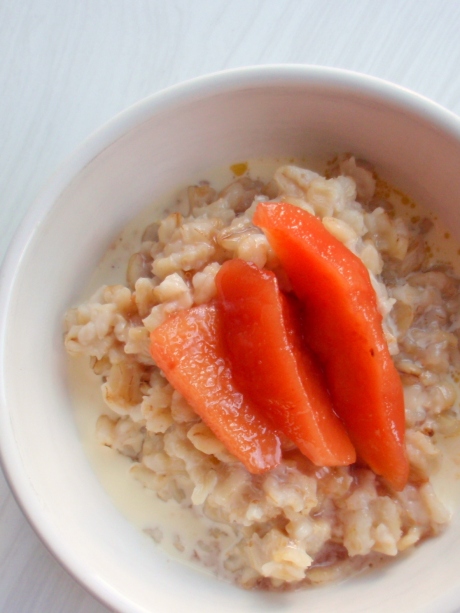
They’re good on their own with a bit of cream or mascarpone, or on top of some puff pastry, popped in the oven, or anything you feel like really – but I couldn’t stop eating them on porridge, as you might have already guessed. They turn something everyday like oatmeal into something really special, especially if you drizzle a bit of the poaching liquid over the top instead of brown sugar or maple syrup. That stuff goes straight to the soul.


GINGER-POACHED QUINCE

Take roughly 250-300g quince (2-3 quinces, depending on size), peeled and sliced, and put into a saucepan with 1-2 thumb-sized pieces of ginger, sliced up, about 3/4 cup sugar and plenty of water. Slowly bring to a gently boil and then turn the heat right down to low. Let simmer for ages until the quince turns a nice rosy hue and the liquid is all gingery and syrupy when you taste it (and taste away, but think of your teeth! This stuff is a cavity in the making).

Keeps forever in the fridge, and is great for countless applications like: for a porridge topping, served with yoghurt, cream or ice cream, to go on/in pastry, etc!

You can just as easily do this with pears. If you do, allow less time to cook. Also, it’ll be easier if you use slightly underripe pears so they don’t fall to bits.

MY FAVOURITE WAY OF COOKING PORRIDGE:

Soak oats* overnight, at room temperature, with 1 tbsp buttermilk or unsweetened yoghurt, and lukewarm water (in an equal proportion to the oats).

In the morning, dump the bowl of soaking oats in a saucepan with some more water (I use the same measurement as I use for the oats).** Put the heat on medium to medium-low, go do some other things for a few minutes (getting ready!) and when it’s cooked to a nice porridgey consistency, take it off the heat.

Put in a bowl. Put a splash of cream and a little pat of butter on top. Don’t feel guilty, they help you digest the oats better. (Unless you’re lactose intolerant maybe.) Top with whatever: maple syrup, brown sugar, lots of fruit, or in this case, the ginger-poached quince (or pear!).

*I usually use 1/3 cup for myself, but feel free to adjust depending on how hungry you are in the morning/how many people you’re cooking for.

**At this point I’ll often add a chopped up banana, or pear, or dates or raisins so they cook along with the oats and get all soft and delicious.

PS. This spoon is Part Three of the castaway airline cutlery my mum dumped on gifted me a while back. One of my favourites: I’m not too clear what the connection between United Airlines and fish scales is/was, but kind of amazing nonetheless. (Parts One and Two are here and here).

creamy jerusalem artichoke & miso soup

In autumn, gluten free, soup on 22 May, 2011 at 11:47 pm

On Thursday afternoon my workmate approached me: “I’m so sorry I never brought you those quinces*, but to make it up I’m going to bring you a surprise tomorrow…” Turns out she’s just as bad as keeping secrets as I am at waiting to find out, and so I quickly discovered that the surprise was freshly dug Jerusalem artichokes from her garden. I’ve been looking forward to Jerusalem artichokes ever since summer, so this was heart-stoppingly exciting stuff. Also it may have been a slow day at work.

So on Friday morning I arrived at work to find, sitting on my chair, a plastic bag tied shut, full of what looked like moist, brown lumps. I did a double take and then remembered: the Jerusalem artichokes, so fresh out of the ground the dirt hadn’t quite dried. Best Friday morning ever.**

These knobbly, alienlike*** tubers aren’t from Jerusalem and they aren’t artichokes either; this combination of ugly looks and peculiar misnomer gives them sort of an oddball charm that I can’t help but love. I found out from Sasa (of Sasasunakku) they’re called topinambur in Austria, which is even more endearing, reminiscent of some awkward imaginary creature (we thought perhaps a round, brown, snuffly marsupial).

But enough about loving these things simply because they’re weird: they’re actually delicious. I only discovered this last autumn, when I had one for the first time as part of a tray of roast veggies at a friend’s potluck dinner. I haven’t looked back since. As long as I could get my hands on them last year, Jerusalem artichokes appeared on my plate. When cooked, they’re almost creamy in texture, nutty-sweet in flavour. You almost expect them to taste like potatoes and then you bite in, and your eyes pop open in a moment of “whoa”: expectations exceeded. Here is a short list of things you can do with these delightful nuggets:

  • roast them, either on their own or tossed into your usual roast veg mix
  • peel, cook & purée them in place of pureed potato or parsnip (also very good mixed in with pureed potato)
  • sauté them with herbs and butter
  • make soup

I love Jerusalem artichoke soup; it’s up there with roasting as one of my favourite ways of eating them. This time, though, I felt I had to do something a bit special, seeing as these Jerusalem artichokes were a bit special themselves, having been hand-dug and delivered to my desk and all. I saw this recipe for a creamy bamboo shoot & miso soup on Just Hungry**** and had this hunch that Jerusalem artichokes would go perfectly in place of the bamboo shoot.

And I was right: the nutty sweetness of the Jerusalem artichokes combined with the deep, salty-earthy miso flavour made every bite of this soup eye-poppingly good. I guess you have to like miso, though; my flatmate didn’t seem too impressed after one bite: “hmm, I can really taste the miso!”

I changed a couple of things from Maki’s recipe – because I wanted the flavour of the Jerusalem artichokes to stand out (and because the leek I had was massive) I upped the Jerusalem artichoke to 2 cups (chopped) and cut the leek by half. I also used Maki’s instructions for making this using uncooked rice, since I didn’t have any leftover cooked rice.

If, like my flatmate, you’re miso-averse, you may want to consider cutting the miso down to 1 tablespoon. Don’t omit it altogether, though – it really makes this soup something else.

*Girl lives in Featherston, has an ancient quince tree and evidently lots more exciting things growing in her garden. She promised to bring me quinces but we both seem to have forgotten… I’m so glad she remembered and felt she had to make it up to me, though!

**well, until morning tea time, when we had an amazing pineapple & brazil nut cake from Pandoro

***though not as alienlike as celeriac

****I may have mentioned it before, but it’s a great blog, with mostly Japanese recipes, written by a Japanese expat

CREAMY JERUSALEM ARTICHOKE & MISO SOUP:
(adapted from this recipe on Just Hungry)

8-10 Jerusalem artichokes (2 cups peeled & chopped)
1 tbsp butter
1/2 the white part of a leek, finely sliced
1 tbsp uncooked white rice
2 cups milk
2 tbsp miso 

Start with the most time-consuming and annoying part: peel the Jerusalem artichokes. Yes, it’s infuriating, because they’re so small and knobbly (I find a sharp paring knife works better than a peeler here, but up to you). Once that’s done, cut them up into fairly even-sized chunks; set aside.

Melt the butter in a saucepan and add the leek. Sauté over medium to medium-low heat. Don’t let it burn. Once the leek reaches that soft-translucent stage, add the Jerusalem artichokes and give everything a good stir; let it sauté for a couple minutes and add the rice along with 2 cups water. 

Turn up the heat to high until the water boils, then lower heat to a simmer and cook for 20-25 minutes until the water’s mostly evaporated and the Jerusalem artichokes are soft when stabbed with a fork. Transfer to a blender (or save use a stick blender – I couldn’t get mine to work, boo hoo!) and purée until smooth.

Return the purée to the pot and add the milk. Heat gently; patience and stirring are key. Once it’s heated through, add the miso: the easiest way to do this is to make a slurry with the miso and a ladleful of soup, and add this back to the pot. Stir and season with salt and white pepper to taste.

I ate this on its own, garnished with a bit of parsley and some sesame oil.

Makes 2-3 servings, depending on how hungry you are. It’s also gluten-free, for those who are so inclined.

persimmon & cinnamon syrup

In autumn, desserts, drinks, gluten free on 19 May, 2011 at 5:39 pm


When I was younger I travelled a lot but ate very little (in terms of variety, not volume). I was one of those awfully picky eaters as a kid, and consequentially I have hardly any food memories of places I visited growing up. Imagine a France with no cheese, Japan with no sushi*, Germany where the only thing I remember eating is peanut butter sandwiches, a trip through the Welsh countryside without… I don’t even know what food there is to eat in Wales, because as far as I was concerned all that mattered was tinned spaghetti.

Clearly times have changed, judging by my trip to Singapore the other weekend, which I mainly spent wiping sweat off my brow in steamy hawker centres eating The Best chicken rice, trekking far from the nearest air-conditioning (this is bravery in 34 degrees and 100% humidity) to find my old favourite nasi lemak stall, taking a 2am stroll to eat some mighty fine bak chor mee before heading to the Arab Quarter to watch election results roll in over coconut shakes and shawarmas.

I started thinking about how much my food/travel relationship has changed because I’ve got this trip coming up where I have a daytime stopover in Honolulu. Besides the exciting possibility of a midday swim, my thoughts turned to what I should eat**… and… came up with nothing besides shaved ice and spam musubi. I’ve been to Hawaii before; surely this shouldn’t be so hard, I thought. Until I realised I was thirteen when I was last in Hawaii and I probably just ate pineapples and peanut butter sandwiches (always the peanut butter sandwich) the whole time. I don’t know, I can’t actually remember.

And basically this has been a very long-winded way of me getting back to the point of this blog post: persimmons. Back to Japan again for a moment: when I was sixteen I spent a year in Japan eating foods I would never have touched before, half out of politeness and half out of stubborn I’ll-show-you-ness (“bet you can’t eat natto/sashimi/basashi!” “I’ll show you!”). Somehow it turned out I actually liked most*** of what I was eating, and the most vivid memories from that year all relate to food.

Japanese culture, at least as I know it, places a big emphasis on the seasons.**** And in autumn, you celebrate the harvest moon by eating tsukimi udon and, among other fruits, you eat a lot of persimmons. One of my (many) favourite memories of autumn in Japan was coming home from school to a plate of exquisitely honey-sweet persimmons, cut up, stuck with toothpicks. So every time autumn rolls around and persimmons show up on supermarket shelves I get really excited and a little bit wistful for that time in my life when I couldn’t shake that wide-eyed feeling of just having discovered The Most Delicious Food In The World.

Usually I just eat persimmons plain. But I’ve been dabbling in making syrups and sauces lately, and for months now (yup, I was excited) I’ve had this post-it note stuck to my computer at work with two words scrawled across it: Persimmons. Cinnamon. I think the combination sprung to mind because I liked the way the words sounded together. (Clearly the best method of combining foods. Oh, and they’re also on that same brown-orange colour continuum.) But actually, they’re both autumn-y flavours, and sort of soft and warming, so the combination works.

You could make the syrup the long way (making juice from the fruit and then combining it with water and sugar to make a syrup and then straining it a couple of times through a cheesecloth so that it’s nice and clear) but if you’re short on time/energy this shortcut method (just simmering the fruit until it starts to break down a bit and the flavours permeate the syrup) works too. It’s so good in cold drinks and on ice cream and desserts and if you save the leftover stewed persimmon, it’s positively swoonworthy.


*Actually, Japan without sushi would be fine. There’s so much other good food there, too, but still. I can’t believe how much I missed out on during those early trips.

**If anyone knows of any must-eat foods or must-visit lunch spots in Honolulu, please share!!!

***Not so much the raw horse, it tasted fine (rather meaty) but I wouldn’t go out of my way to eat it again.

****Come to think of it, this might be the root of my near-obsession with seasonal fruits and vegetables. And seasons in general.


PERSIMMON & CINNAMON SYRUP: (the cheat’s version, anyway)

Cut about 300g persimmons (2-3, depending on size) into cubes and place in a saucepan with 130g sugar and a couple of broken-up cinnamon sticks.* Add 2/3 cup water and bring to a boil; reduce heat and simmer until it reaches, well, a syrupy consistency. Strain through a fine-meshed sieve into a bowl or jug and pour into a sterilised bottle. Done!

Now, what to do with this syrup? For starters, you can mix it with sparkling water for a refreshing drink. I can imagine it’d be good mixed into a rum-based cocktail too, something about those warming cinnamony undertones. Or you can pour it on ice cream, mix it into yoghurt, just about anything really.

Oh, and keep the strained, stewed fruit: it’s incredibly soft, sweet and infused with a cinnamony tingle. Perfect on porridge, or with yoghurt or custard. Definitely don’t throw it out (you’ll have to pick out the bits of cinnamon stick, though).

*It’s well worth using cinnamon sticks for this rather than powdered cinnamon. The flavour is more intense and you’ll retain that sunset-orange persimmon hue: they won’t turn the liquid brown like the powdered stuff might.

PERSIMMON & CINNAMON COULIS:

Here is a bonus recipe, because the first time I tried making this I accidentally pushed the fruit through the sieve and ended up with something that was more of a coulis than a syrup.

It’s hardly a recipe: basically, do as for the syrup, but use a bit less water (or simmer longer), remove the cinnamon sticks at the end of cooking, then purée (a stick blender works great here) and strain through a sieve. It’ll be a bit thicker than the syrup. And it’s awesome on French toast.

chilaquiles, and the best salsa verde

In autumn, Mexican, snacks on 30 April, 2011 at 8:38 pm

It started with these tomatillos. Well actually, it started before the tomatillos: it started with this blog post. Or you could say it started even before that; all summer I’ve been keeping an eye out for tomatillos, with no luck whatsoever. I’m sure once, years ago, I saw them at Moore Wilson’s, but whether I missed them this year or they weren’t there I’ll never know.  Anyway, I’ve been hanging out for a good salsa verde, the Mexican kind, with tomatillos and jalapeños and coriander. The kind that came standard with a bowl of complimentary, freshly fried tortilla chips at the late-night taco shops I used to frequent as a teenager in suburban Chicago (which were way better than I just made them sound, by the way).

So when Sue blogged about her tomatillos over at Five Course Garden, one thing led to another and I ended up having a cup of tea and a chat in her hot-cross-bun-scented kitchen last Saturday afternoon, and left with a bag full of tomatillos (as well as parsley and sorrel that went into another kind of salsa verde altogether, and a wee passionfruit) she kindly donated to my tomatillo-deprived kitchen.


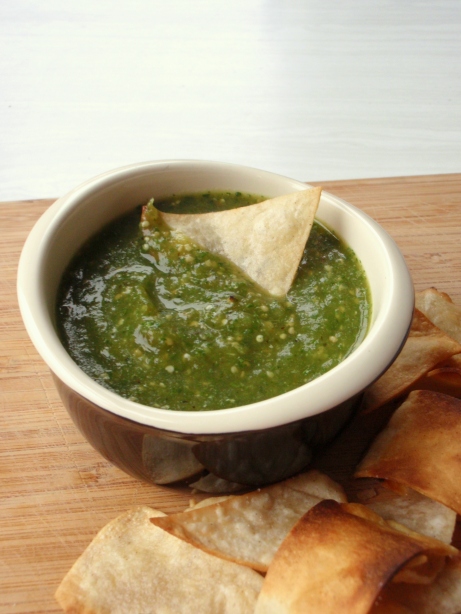
They sat in a bowl in my kitchen till Monday (poor Easter planning on my part meant I  had no corn tortillas at home) but then I did what I had to do: cut up some tortillas, fried into chips, sprinkled with a bit of salt, drained on paper towels. Tomatillos, jalapeños, roasted till juicy and blistery, dumped in a blender with coriander, garlic, onion, salt, a bit of water; blended till smooth and the sharp, familiar scent of tomatillos filled the air. Thinned out with a bit more water, just enough so that it was reminiscent of the salsa verde at my favourite Chicago taqueria, snuck a taste, let sit for a bit to let the flavours meld. Got way too excited and started eating all the chips dipped in the almost-too-hot salsa: bliss. I only stopped myself because I remembered the whole reason why I made chips in the first place was to try this recipe for chilaquiles verdes.*

Rather than baking them in the oven I ended up using the technique from this recipe (for chilaquiles rojos), where the chips are tossed in a pan of bubbling sauce and cooked till just soft. Once I had all the components ready it only took a few minutes to put together, simmering the fresh chips (there aren’t many snack foods better than freshly made tortilla chips) into the bubbling green sauce rounded out with sour cream and chicken stock, slopping the whole thing on a plate, topping with chicken and cheese and sour cream and more salsa. It took even less time to devour.

I wasn’t sad then, because I still had plenty of salsa left. But by the following night it was all gone – used up for the best enchiladas verdes I’ve ever made – and I had that twinge of guilty longing you get when you’re enjoying something with no guarantee you’ll have it again, at least for a long time. Bittersweet, like the last meal on an overseas holiday. I wanted every bite to last forever. I also wanted more salsa to magically appear so I could make more chilaquiles. Oh well. Maybe next year.


So. If you’re lucky enough to have a good source of tomatillos**, make this before the season’s over for the year. Otherwise I’d suggest planting some next spring (it’s what I’ll be doing, and they seem to grow well here), and then making this salsa. And then: these chilaquiles.

I couldn’t say this enough, but many, many, many thanks to Sue at Five Course Garden for giving me these tomatillos. I was the happiest person in the world eating this.

*Looking through internet recipes, it seems there are as many variations on chilaquiles as there are breeds of dog. Er, that makes it sound like this recipe somehow involves dogs, which I can assure you it does not, but you know. Lots. And I haven’t been to Mexico (though I did grow up in a city with a big Mexican population) so I can’t vouch for authenticity at all. But whatever. These are damn good.

**I’ve seen cans of them in Moore Wilson’s but at $9 a pop they’re not cheap. If you are reading this from a more tomatillo-acquainted area, I am so jealous of  you.

ROASTED TOMATILLO SALSA VERDE:
(adapted from this recipe

Preheat the grill/broiler setting on your oven. Take roughly 500g tomatillos – remove the papery outer husks and rinse (they’re sticky) – and slice in half.* Place on a tinfoil-lined baking tray, cut side up, along with 2-4 jalapeño peppers (depending on how spicy you want the end product).** Pop this in the oven right on the top rack; cook for a few minutes until the tomatillos are soft and almost-burnt and the jalapeños are charred (don’t worry, you’ll be peeling off the charred skin). Peel the jalapeños and remove the seeds if you prefer a milder salsa. Put the tomatillos, jalapeños, a big handful of coriander, 1/2 a chopped onion, and 2 cloves garlic into a blender. Add about 1/4 cup water and a bit of salt in there as well, and purée until it reaches a sauce-like texture.*** Add more water if you want a thinner salsa; season with salt, let chill for at least 30 minutes so the flavours have a chance to mingle a bit.

This recipe makes quite a bit – it says 2 cups but I swear I got at least 2 1/2, maybe closer to 3.

*I don’t know why I did this instead of leaving the tomatillos whole. Maybe so they’d cook faster. Anyway, you can skip this if you want, but you may need to leave them in the oven a bit longer.

**I used 4, and left the seeds in; the salsa had a big roundhouse-kick heat to it but wasn’t too bad for my tastes. I like spicy food, though, so if you’re not big on chillies you may want to use less, or add them to the blender one at a time.

***you can make this smoother or chunkier depending on your preference.

HOMEMADE TORTILLA CHIPS:

This isn’t so much a recipe as it is a method: cut corn tortillas into triangles, fry in a bit of hot oil till golden, drain on paper towels. Sprinkle some salt on them while they’re still hot. Eat as soon as they’re cool enough to handle. Save some for the chilaquiles.

CHILAQUILES VERDES (serves 2):
(adapted from here and here

Heat a bit of oil in a skillet; when hot, add roughly 1  to 1 1/2 cups salsa verde. Give it a good stir while you let it heat up so that it’s nice and bubbly, then stir in 1 cup chicken stock and 1/4 cup sour cream. Taste and adjust seasoning as you see fit, then bring back to the boil. Add roughly 120g tortilla chips (I didn’t weigh mine. You could easily just eyeball it depending on how much you think you’ll eat) and simmer for about 5 minutes until just soft. To serve, top with warmed shredded chicken (leftover roast chicken would do perfectly)*, cheese (I used a bit of crumbled feta and goat’s cheese), sour cream and a bit more salsa. Eat with a fork – these are messy in the best possible way.

*I didn’t have any leftover roast chicken. Unless you’ve had a roast the night before you may not either. So what I did was poach a chicken leg in a little pot of water along with bay leaves, a cinnamon stick, a spoonful of cumin and a couple sprigs of oregano. Once the chicken was cooked, I pulled the meat off the bones with a couple of forks and kept the poaching liquid to use for the stock called for in the recipe. Also, you could just as easily make these vegetarian by omitting the chicken and using vegetable stock, if you’re so inclined. 

roasted pear, leek & chicken salad

In autumn, salads on 11 April, 2011 at 7:20 pm

Having grown up in a part of the Northern Hemisphere that saw bitter, icy winters with hardly a hint of life for the better part of six months, autumn in Wellington feels almost like a tease. No forests ablaze in mustard* and vermilion, no mountains of raked-up leaves lining the streets. Here we rely on subtler hints that it’s not summer anymore: a little edginess to the wind, the sun just a bit duller, glimpses of gold and red here and there. But our autumn still stirs up that sort of peaceful melancholy that sets in around this time of year, a settling-down feeling, not altogether unpleasant. I’ve been relishing it – listening to the right music (a lot of Angus and Julia Stone, can’t believe I only just discovered them over the weekend), eating lots of apples and pears, wearing tights and woolly jumpers and learning to play the blues on the saxophone.** Melancholy, yes, but also sweetly satisfying.

And autumn’s all about satisfaction. Spring is hopeful and yearning, all green, tender asparagus shoots, and summer’s luscious and burning and exuberant, but autumn:

Autumn is full of the satisfaction of pulling fruit off vines, off trees, vegetables from the ground, the warm lingering contentment of apple crumbles and steaming cups of tea. And this salad, with succulent bits of chicken, tangy goats’ cheese and tender, yielding leeks, is such a pleasure to eat it almost feels wrong. It’s not. It’s plenty good for you, and the warm, roasted pears, meltingly sweet, push this dish over the edge: bliss.

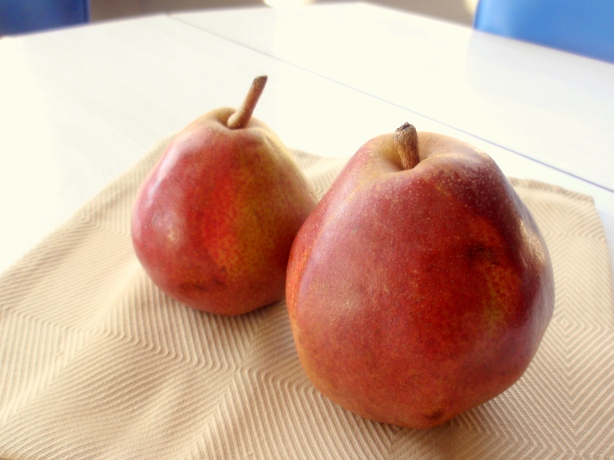
No manmade dessert comes even close to the deliciousness of an unadorned, soft-ripe pear, but roasting them brings out that mellow sweetness when all your pears are firm and you don’t feel like waiting around for them to ripen. It feels a bit like cheating but the result is delicious in its own right.

I had almost forgotten about how good this salad is, having made it a couple of times last autumn out of the then-current issue of Cuisine. I’m so glad I spent a few luxurious hours over the weekend curled up in bed with the cat, thumbing through a stack of cookbooks and magazines. It’s the perfect salad for the weather, for the season, for the mood I was in.

So make this salad, now, maybe a couple of times over the next few weeks, but don’t overdo it (it’s a little bit special). Make it when you’re feeling fulfilled and content and just a wee bit sad, make it when you’re wholly satisfied and things couldn’t be better, make it when the skies are pleasantly grey and little dead leaves are blowing across the pavement. And then don’t make it again for a whole year until that wistful autumn half-smile appears on your face again, and relish in the thrill of rediscovery.

*Speaking of mustard, aside from it being delicious, I am positively lusting over bits of mustard popping up on clothes and accessories this season… am very much feeling the need-a-new-autumn-wardrobe vibe. So far, have been squirreling my money away responsibly instead… but a girl can dream.

**For what it’s worth I mostly sound like a dying goose but my goodness it’s fun. And by “the blues” I mean fiddling around with blues scales and feeling very triumphant about it.

ROASTED PEAR, LEEK & CHICKEN SALAD: (serves 3-4)

(Only very slightly adapted from Cuisine, May 2010)

3 chicken legs**
2 firm pears, cut into wedges
1-2 leeks (depending on size),  sliced on the diagonal
2 cloves garlic, chopped
1 tablespoon yellow mustard seeds
1/2 tsp fennel seeds
1 to 1 1/2 cups torn ciabatta
baby cos and baby spinach
crumbled goats’ cheese
salt, pepper, olive oil

Preheat oven to 200ºC.

Season chicken with sea salt and cracked black pepper, place in roasting dish with the pears and leeks. Give everything a good drizzle of olive oil and sprinkle the mustard and fennel seeds and chopped garlic over everything; chuck it in the oven for 40-45 minutes until you can’t stand how good your house smells and the chicken is brown and crispy-skinned and the pears and leeks are meltingly soft.  Once it’s done, pull the roasting dish out of the oven and let it sit for a few minutes.

While the chicken’s in the oven tear up some ciabatta bits (or any stale bread you have lying around will do), give it a swirl of olive oil and a sprinkle of salt and pepper, pop that in the oven too, but only for about 10 minutes until it crisps up.

In those last minutes of waiting, get the salad ready: place the greens on a big platter or on individual plates. Remove the chicken, pears and leeks from the roasting dish, carve the chicken into big, juicy chunks, place on top of the greens with the pears and leeks.

Pour off the fat from the roasting dish and heat on the stove, then deglaze with red wine vinegar, letting it bubble and mingle with the little bits stuck to the pan. Pour this over the salad, immediately sprinkle the goats’ cheese on top, and dig in while it’s still hot and the leaves are crunchy.


*I used legs because I prefer juicy dark meat, but you could just as easily use breasts, a combination, or a whole spatchcocked chicken as in the original recipe. If you do this you may need to increase the quantities a bit, or just have leftover chicken. All good either way.


cranberry bread pudding

In autumn, baking, desserts, puddings on 28 March, 2011 at 12:43 pm

If you’re anything at all like me you’ll have in your pantry, at any given time, an assortment of five or seven half-eaten loaves of bread, at varying degrees of stale to rock-hard, floating around in crumpled paper bags, wreaking havoc on the rest of the cupboard contents (because really, half-eaten loaves of bread aren’t made to slot neatly into jam-packed shelves).

And if you’re anything at all like me you’ll start to panic every time you open your pantry, because there’s Too Much Stale Bread floating around on top of the rest of the stuff and when you try to grab the sugar, or eggs, or heaven forbid something like rye flour or barley that lives at the back, the crumply paper bags will come tumbling down. And you’ll decide it’s time to take action.

If your bread’s on the soft end of stale you might make French toast, or panzanella, and if you’re making a salad or soup for dinner you might make croutons, but if you’re on a sugar kick and you’re not responsible for anyone else’s wellbeing you’ll get out a serrated knife and hack your bread into cubes, ready to soak in a sweet, milky-eggy custard base: Dessert for Dinner.*

Last time I wrote about suffering the consequences of having eaten too much dessert. This was one of the culprits that left me in a sugar-coma and ultimately led me to declare a sugar-free week last week (a partial success – I made it through 1.5 days**). But anyhow. There’s still something about dessert for dinner that means I do it anyway, though I’m fully aware of the consequences.

And when I don’t have a lot of energy (or ingredients) to make something elaborate***, this pudding is something I turn to. It’s quick to put together, uses the most basic of ingredients, smells glorious in the oven. Plus I must be doing some good by clearing some of that stale bread out of the cupboard, right?

Bread and butter pudding (or technically, in this case, bread pudding since there’s – gasp – no butter in this pudding) isn’t something I grew up with. Probably a good thing, because I love it so much I probably would have easily fallen into a personal childhood obesity crisis. In fact, it wasn’t until I was about nineteen and waitressing over the university holidays that I first tried it. In the restaurant kitchen there was always a warm tray of grey, gloopy bread pudding that would inevitably be left over at the end of the night. I didn’t blame the customers; there were far more attractively presented desserts on the menu, and for a long time I turned my nose up in disgust.**** But at the end of one night, feet aching from what seemed like a marathon dinner service, I was offered a bit of pudding. It was past midnight, I hadn’t eaten since about 3pm, all I wanted was to collapse into bed but there was still work left to do, and that soft, raisin-studded cinnamony slop suddenly became my new best friend.

Since then I’ve taken to making this when I’m cold, when I’m tired, when I need to feed dessert to a crowd, when I need to clear out my cupboards, when I’m overwhelmed with sorrow or joy or stinging indignation. I know the whole emotional-eating-is-bad-for-you deal has some truth to it but there’s really nothing more comforting.

Now that I usually make my own I prefer bread pudding to have a bit of structure rather than that first soggy, wobbly mess I had at the restaurant (still tasted amazing, but you know, personal preferences). If you like yours to be totally soft and supple, just adjust the quantities of bread or liquid to saturate the bread. A longer soaking time, especially if your bread is extra-stale, wouldn’t hurt either.

Because this is such a straightforward dessert it’s easy to experiment with variations. I often use the old standard of raisins or apples, though pear and ginger is a good combination as well as banana and nutmeg. This time around I dumped in some cranberries I found in the back of the freezer. It was a good call: their almost-sour tartness cut through the sweet, custardy bread, making this more of a grown-up dessert.


*or, of course, you could do as normal people do and make this as, well, Dessert for Dessert. If you’re really trying to use up a lot of stale bread you could always have salad (with croutons), soup (with croutons or little crispy toasts), aaaaand then this pudding. And maybe whizz up whatever’s left to freeze as breadcrumbs. Now there’s an idea.

**I was doing really well up to the point where it was afternoon tea time and not one, but two cakes appeared at work, along with a platter of fruit. Should’ve just stuck with the fruit, but hey… they were good cakes.

***which is usually part of the reason I’m having dessert for dinner in the first place.

****At age nineteen I was far from open-minded about food, though my attitudes were starting to change!

CRANBERRY BREAD PUDDING (serves 4-6, or more depending on how stingy you are in dishing it out):

Preheat oven to 170C.

Cut stale bread into cubes or chunks, about 3cm will do. Fill a baking dish with these (or, if you want to be precise, measure out 4-5 cups). Add 1 1/2 cups fresh or frozen cranberries and mix so that they’re evenly distributed.

Beat 4 eggs with 2 cups milk, 1 tsp vanilla and 3/4 cup sugar* until well combined. Don’t be tempted to dip your spoon in this mixture for a taste. You might end up drinking the whole mixture. And just wait, there’s an even more delicious cook’s treat ahead…

Pour the liquid mixture over the bread, give it a stir, let it soak for a bit until the bread has absorbed most of the liquid. STOP EATING THE SOAKING BREAD CUBES or you’ll have no dessert left. (Or, if you’re like me, you can just top up by cutting up some more bread cubes and adding a bit more sugar/milk mixture)**

Before you can pop any more custard-soaked bread cubes into your mouth, sprinkle some demerara sugar on top and pop the baking dish in the oven. Bake for 40-50 minutes or until pudding is set and golden brown on top.

Serve warm, topped with cream whipped with a little vanilla paste and caster sugar. Or vanilla ice cream. If you have any left over, eat it for breakfast in the morning. I mean, it’s pretty much French toast!

*you can adjust sugar quantities to taste – anything more than 3/4 cup I find to be sickly sweet, but to each their own – and less is fine, too.

**no wonder I had a stomachache after this.

Red bell pepper bisque

In autumn, late summer, soup on 20 March, 2011 at 11:55 pm

I’m conscious that I’ve been eating a lot of sugar lately (just look at the last few blog posts for proof). Call it disaster-triggered comfort eating or whatever, but over recent weeks I’ve been victim to one too many cake-batter-induced tummyaches and sugar-overload sore throats. Dessert for dinner just doesn’t have the same appeal when you do it several nights in a row.*

Things came to a head last week when I made this amazing semolina-cashew slice and Could Not Stop Eating it. I swore I’d lay off the sugar the next day and was doing so well at work, passing up cookies at morning tea, having a salad for lunch, not reaching for that bar of emergency chocolate hanging out in my desk drawer. I was full of this triumphant sense of accomplishment until I got home and… oh hello leftover semolina slice!**

So I’ve been trying to balance out the sugar with reasonably healthy things. Like soup. I know I’ve been whining about the end of summer for the last few blog posts*** but I’m actually harbouring this secret excitement for cooler weather and autumn (I won’t dare say I’m excited for winter, but close enough) and SOUP.

If there’s ever a soup that can be both spicy and soothing at the same time, it’s this one. It adeptly bridges the gap between summer and cooler weather: the flavours are bright and bursting with height-of-summer-ripeness, but at the same time it’s earthy and robust and the cayenne pepper adds enough heat to warm you from the inside on a cold rainy day. (This soup is also really good served cold at lunchtime, ideally on a sunny deck or balcony, maybe garnished with some chopped parsley.)

The recipe is from this book my mum got me called Cooking School Secrets for Real World Cooks. It’s full of consistently accessible (and good!) recipes and informative sidebars full of tips and tricks but no photos, which is somewhat unusual for cookbooks these days but, you know, all good. It’s been one of my favourite cookbooks over the years and this is one of the first recipes I ever made from it.

Though the page is dotted with bright orange splatter-marks I hardly need to look at the recipe anymore, it’s so simple: red capsicums cooked with the holy trinity of carrot, onion, celery, plus a bit of cayenne pepper for heat and a bit of cream for… creaminess. You don’t really need to think much while making this, which makes it the perfect recipe for getting back into the soup groove.

*Dessert for dinner is still awesome though.

**I am going to start over this week, er, well, after the waffle breakfast we’re having at work tomorrow!

***although summer is clearly still not over, seeing as I’m typing this sitting on my balcony, no sleeves, bare feet.

RED BELL PEPPER BISQUE (serves 3-4):
recipe from Linda Carucci’s Cooking School Secrets for Real World Cooks

You will need:
olive oil
1 onion, chopped
1 carrot, chopped
1 celery stalk, chopped
cayenne pepper
4 red capsicums, seeded, deribbed & roughly chopped
1 litre chicken stock (ideally homemade, but anything goes)
1/4 cup cream
sea salt, freshly ground pepper
crème fraîche

Heat 3 tbsp olive oil in a decent-sized pot over medium-high heat, add the onion, carrot and celery and saute for several minutes until the onion is soft and translucent. Add 1/4 tsp cayenne pepper and the capsicum, give it a good couple of stirs and let the capsicum cook for about 5 minutes. Add the chicken stock (you may not use the whole litre, the idea is you want enough stock to cover all the vegetables in the pot). Bring to a boil, reduce heat, simmer about 30 minutes.

At this stage the capsicum and carrots should be nice and soft and cooked. Take the pan off the heat and blend until smooth (a stick blender works perfectly here but do as you please), then strain through a medium-mesh sieve.* Smush the pulpy bits with a spatula or ladle to squeeze the last bits of liquid out.**

Add 1/4 cup cream and salt and pepper to taste. If you want it spicier go ahead and add a little bit more cayenne pepper but beware that this stuff increases exponentially in heat (this book is full of these fun facts!). Garnish with a big spoonful of crème fraîche***, drizzle with olive oil, crack some black pepper over the top, eat!
If you have any left over the next day, it is just as good (if not better, depending on the weather) straight out of the fridge.


*If you’re feeling lazy you can skip this step but the silky-smooth texture of the strained soup is totally worth it.

**For what it’s worth, I found this step oddly reminiscent of making pâté…

***OK, so it’s just a garnish, but the crème fraîche definitely takes this to another level. Especially if you strained the soup. The combination of the silky-spiciness and the silky-cool-creaminess is so ridiculously dreamy.